In this post we continue to create our DIY Fan book. If you have not already read part one, you can do so here—and I recommend you do, because this post will not make sense without having read part one.
You will need:
- Thread in your choice of color (I used black)
- 5 needles
- Scissors
- Beads (optional)
1. Punch the holes
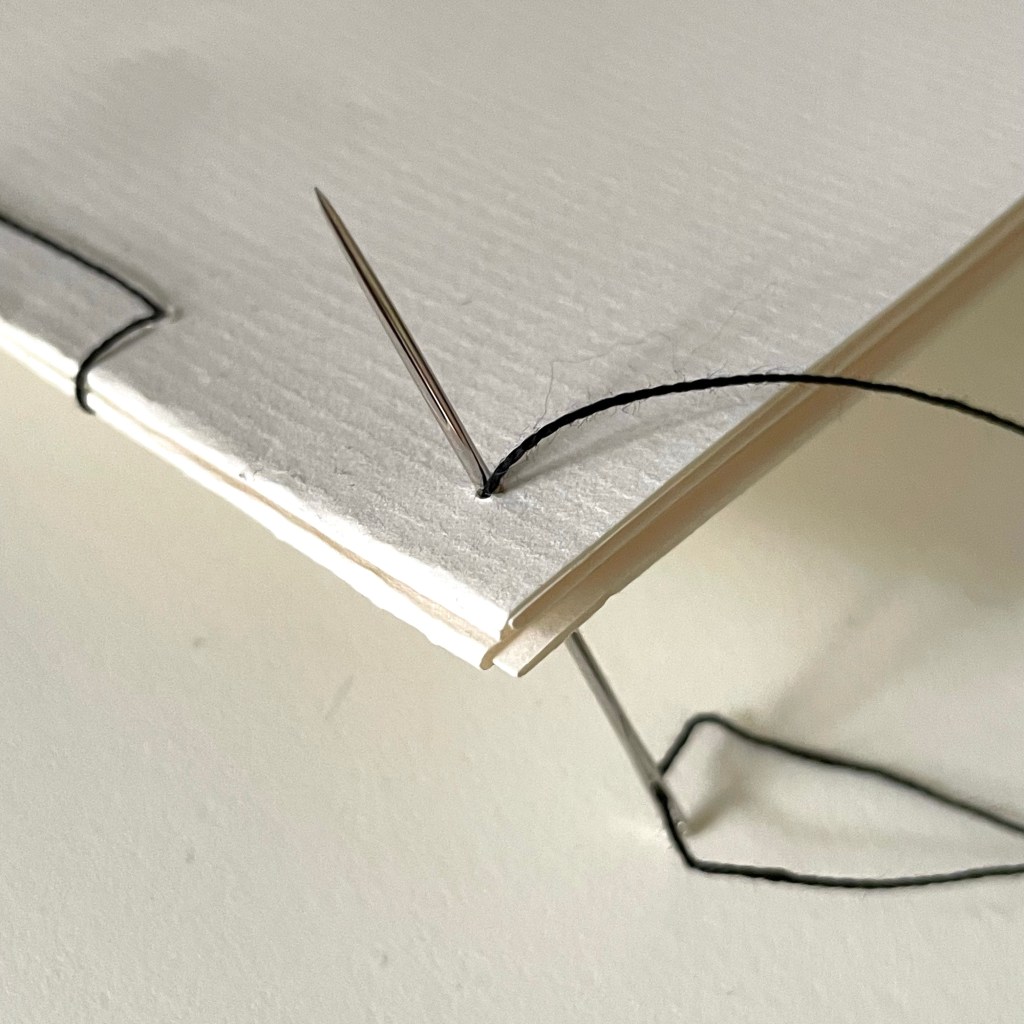
The binding we are making for our book is called a Japanese stab binding. If you observe the image below, it will quickly become apparent why it is called this.
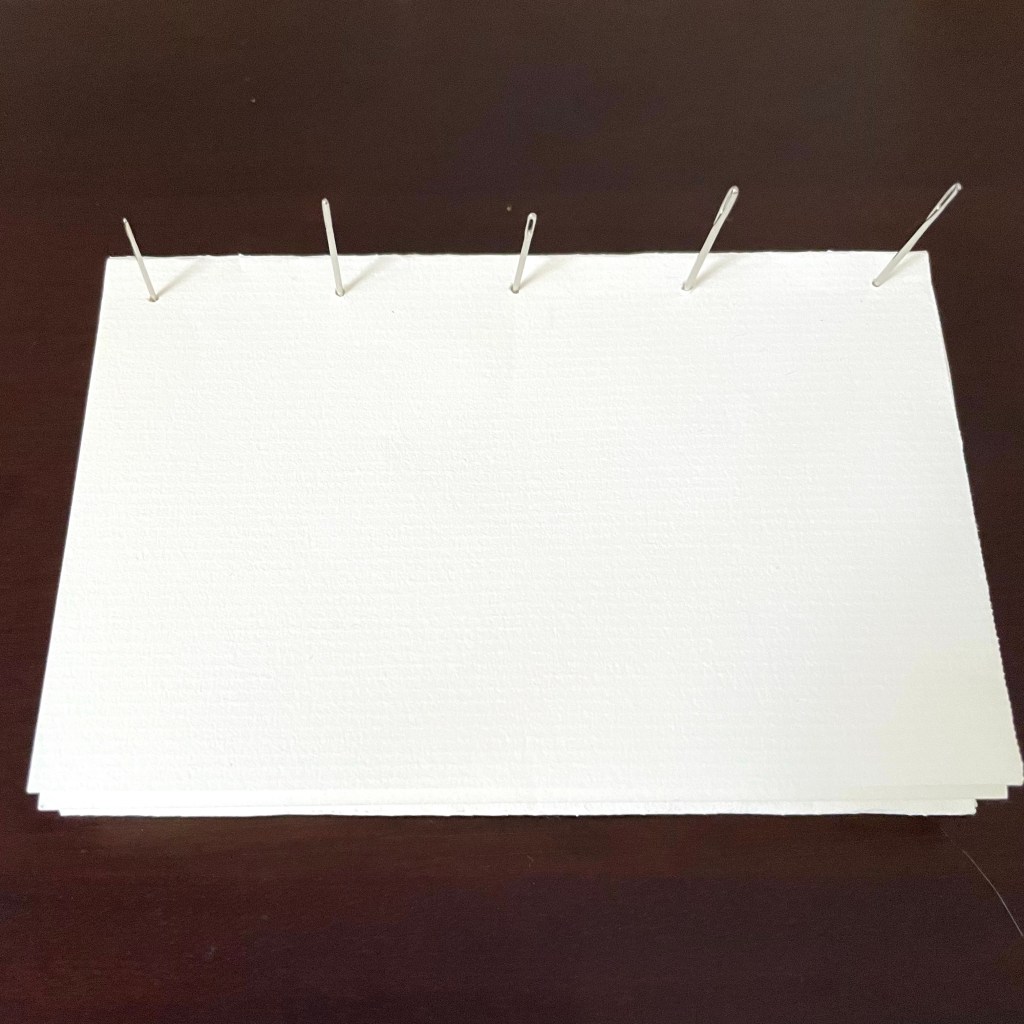
Position your book as pictured, with the pages facing down and the edge you are binding at the top. Then, use the five needles to punch five holes along the edge: one in the center, one at each end, and one halfway between each end hole and the center hole.
TIP: To ensure your holes are all aligned properly, you can use a ruler and pencil to draw a line parallel to the binding edge, and then punch the holes. Then erase the line.
I did my hole punching free-hand, so some of them are a little off-center.
2: Stash the needles (except for one)
Remove the needles. Put away 4, and keep the last for sewing the binding.
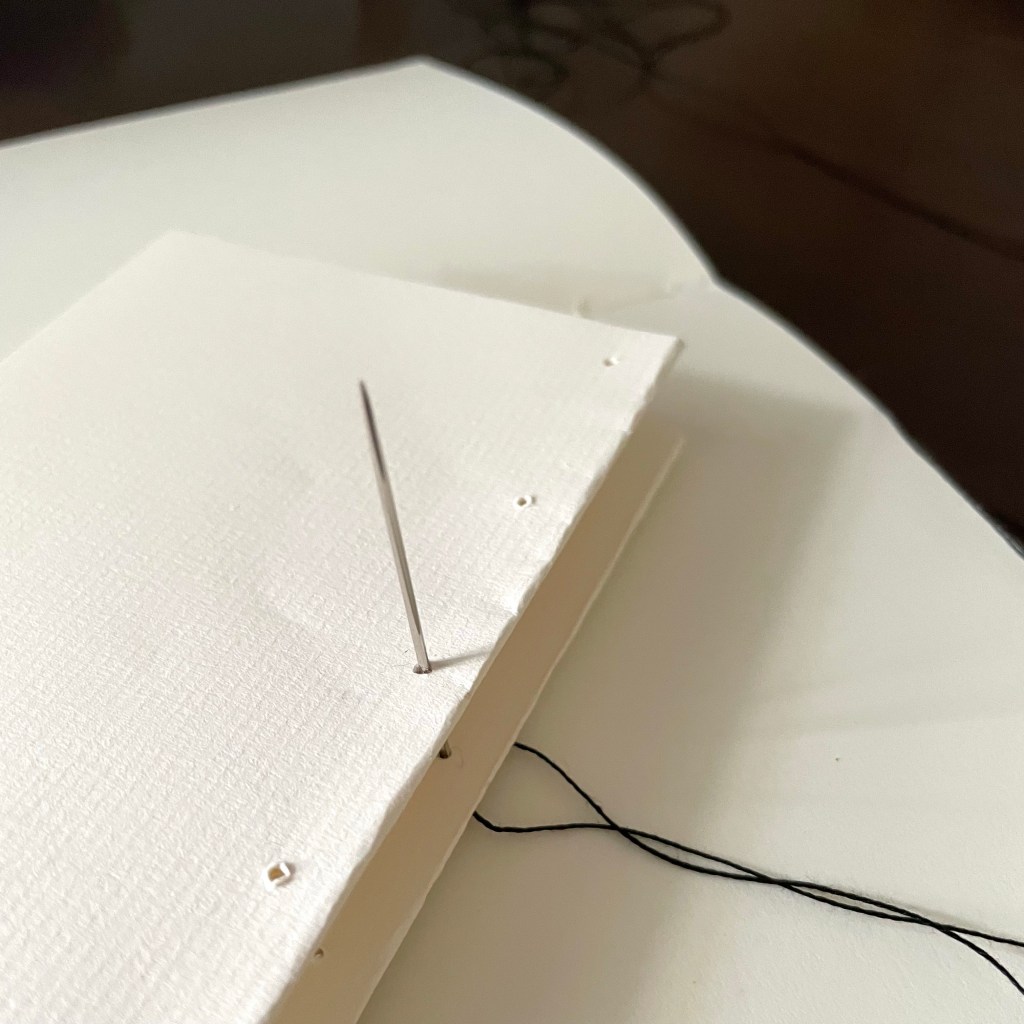
3: Thread the needle
Cut a piece of thread about 1 yard long, and thread your needle.
4: Reposition the book
Reposition your book so that the free pages are in your non-dominant hand, and the binding edge is facing your dominant hand.
5: Sew the binding
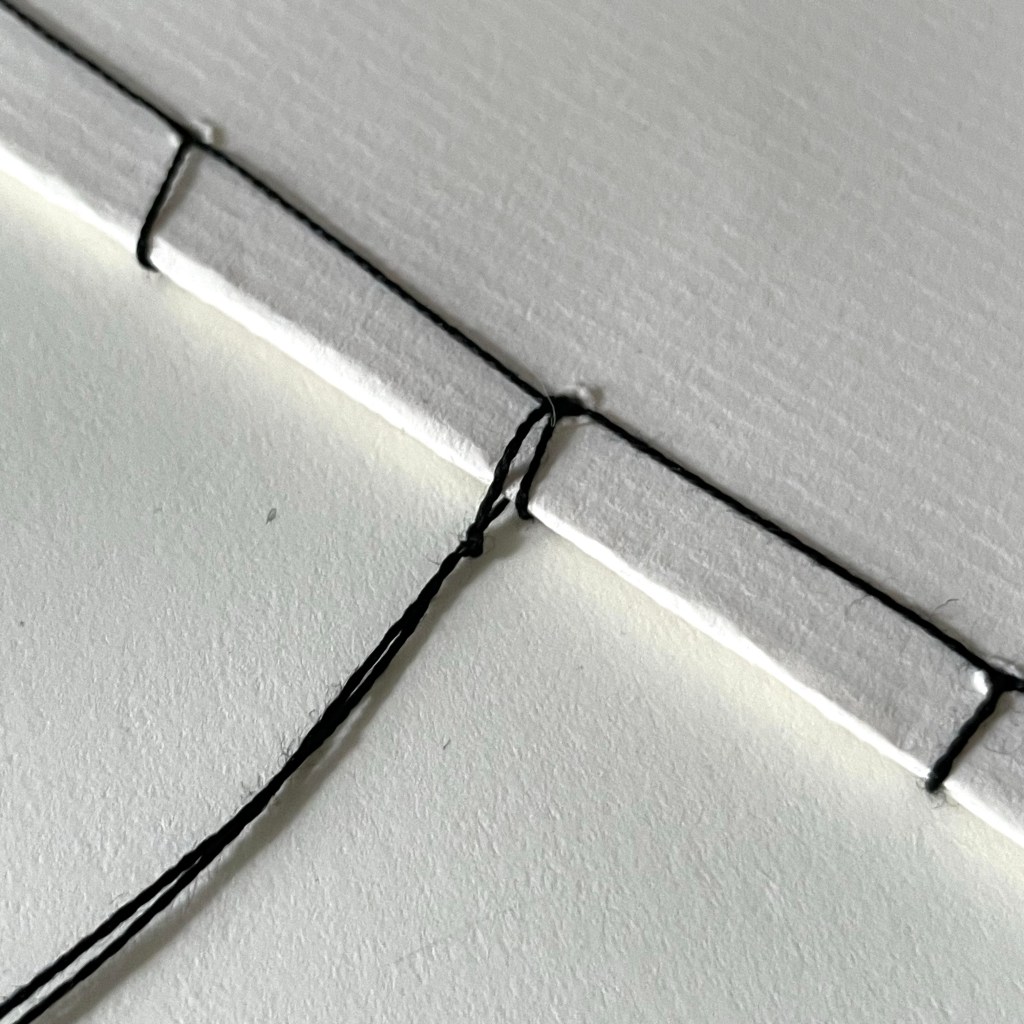
Now we will sew our binding. If you followed the steps as written, you should have five holes punched along the binding edge, which is vertical. Below is a list which identifies how I will refer to each hole, and indicates which of the numbered steps is performed with each.
- Top hole: 5, 6, 7
- Top middle hole: 3, 4, 8
- Center hole: 1, 2, 9, 16, 17
- Bottom middle hole: 10, 11, 15
- Bottom hole: 12, 13, 14
Steps
- Bring the needle up (back to front) through the center hole. Leave a tail of about 12 inches in length.
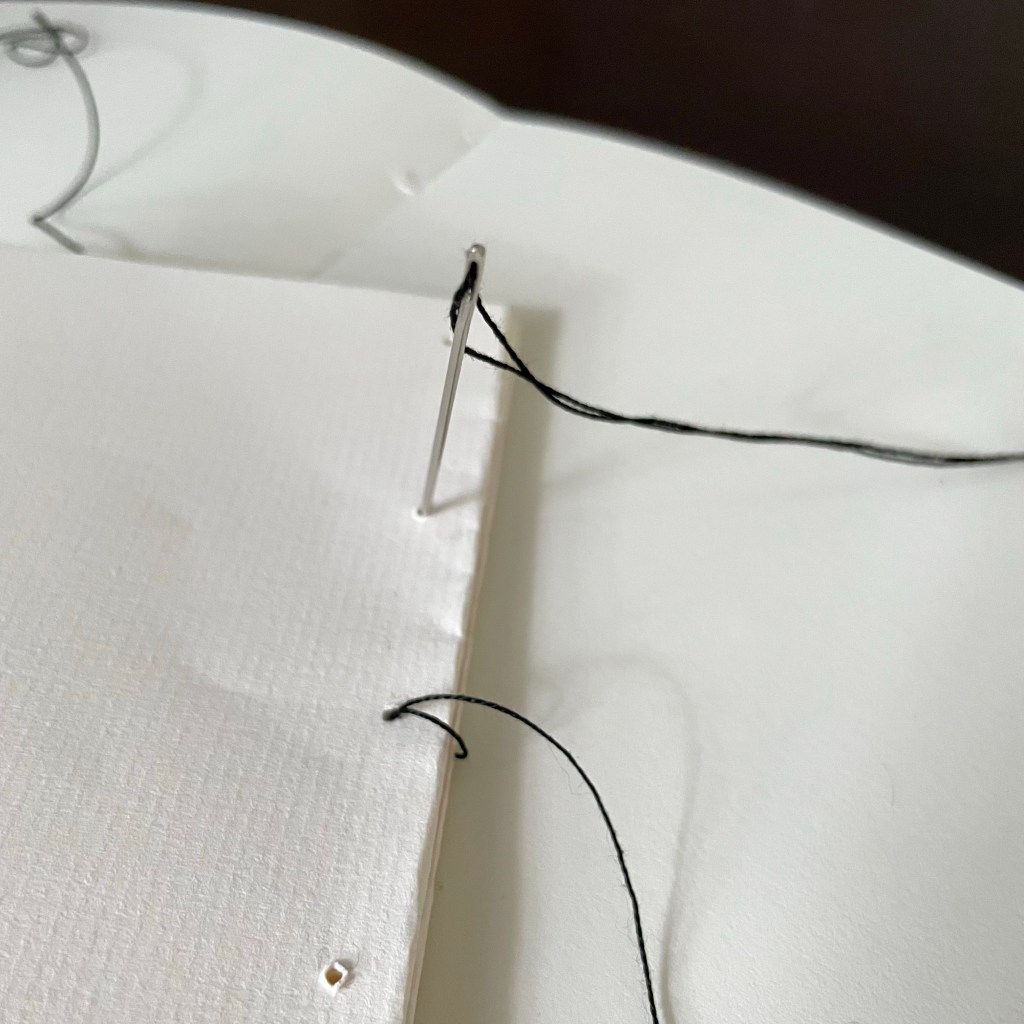
- Bring the needle from back to front through the center hole. This will create a loop around the binding edge.
- Bring the needle from front to back through the top middle hole.
- Bring the needle from front to back through the top middle hole. This will create another loop around the binding edge.
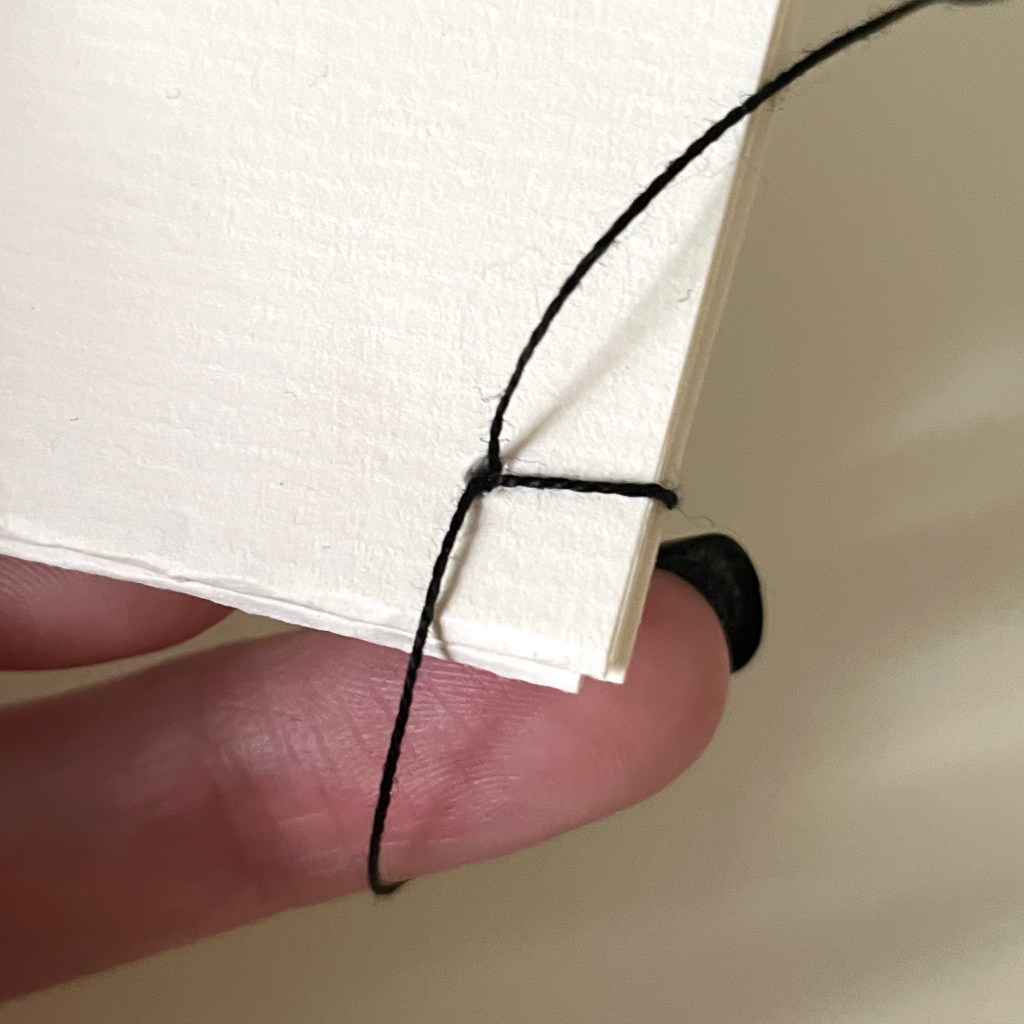
- Bring the needle from back to front through the top hole.
- Bring the needle from back to front through the top hole to create a loop around the short edge of your book.
- Bring the needle from back to front through the top hole to create a loop around the binding edge of the book.
- Bring the needle from front to back through the top middle hole.
- Bring the needle from back to front through the center hole.
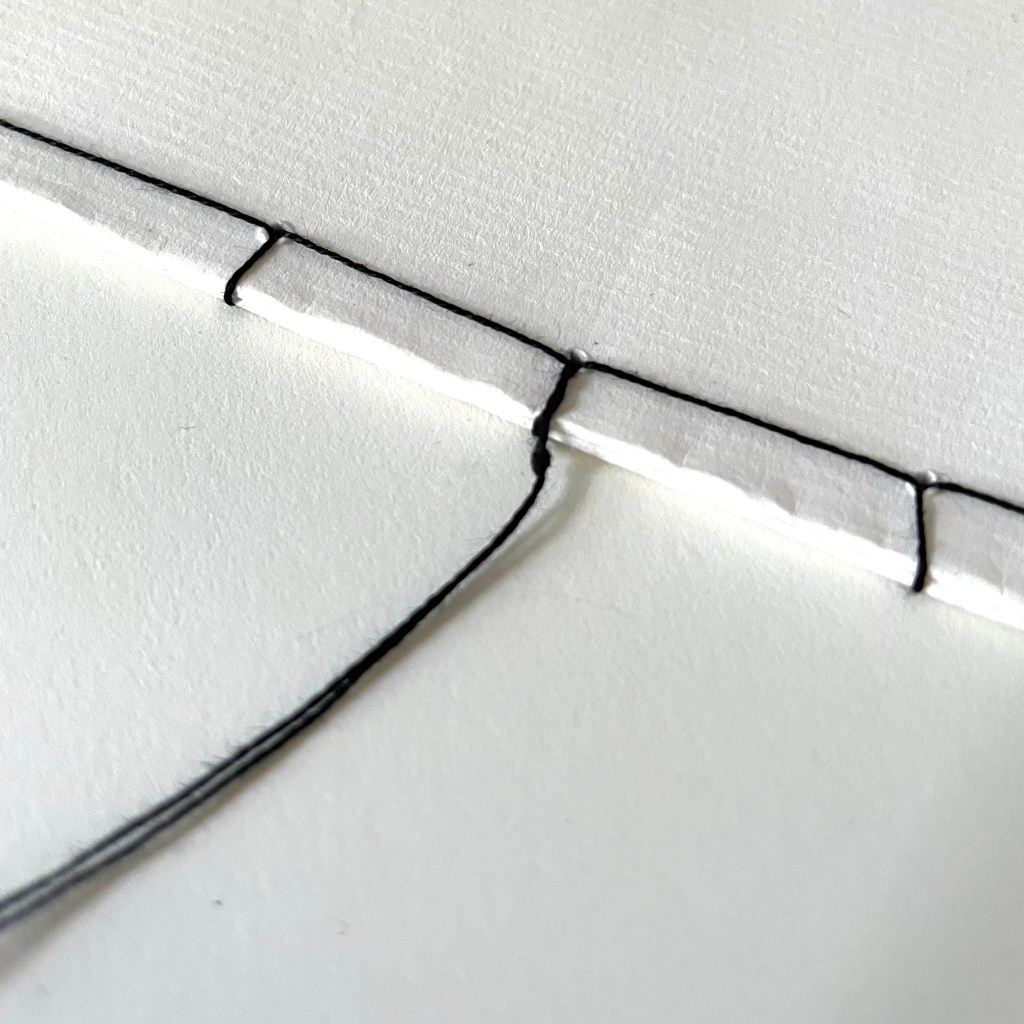
- Bring the needle from front to back through the bottom middle hole.
- Bring the needle from front to back through the bottom middle hole. This will create a loop around the binding edge, just as you did with the top middle hole.
- Bring the needle from back to front through the bottom hole.
- Bring the needle from back to front through the bottom hole to create a loop around the short edge of the book, just as you did with the top hole.
- Bring the needle from back to front through the bottom hole to create a loop around the binding edge of the book.
- Bring the needle from front to back through the bottom middle hole.
- Bring the needle from back to front through the center hole.
- Bring the needle around and through the loop on the center hole, then bring the needle through the center hole from front to back. This will position one end of the thread on each side of the binding edge. (If you bring the needle/thread from front to back without first making the loop, you will simply undo step 16.)
Once you have done this, remove the thread from the needle.
Pictures
For the visual learners, here are some pictures of how your book will look during the various steps.

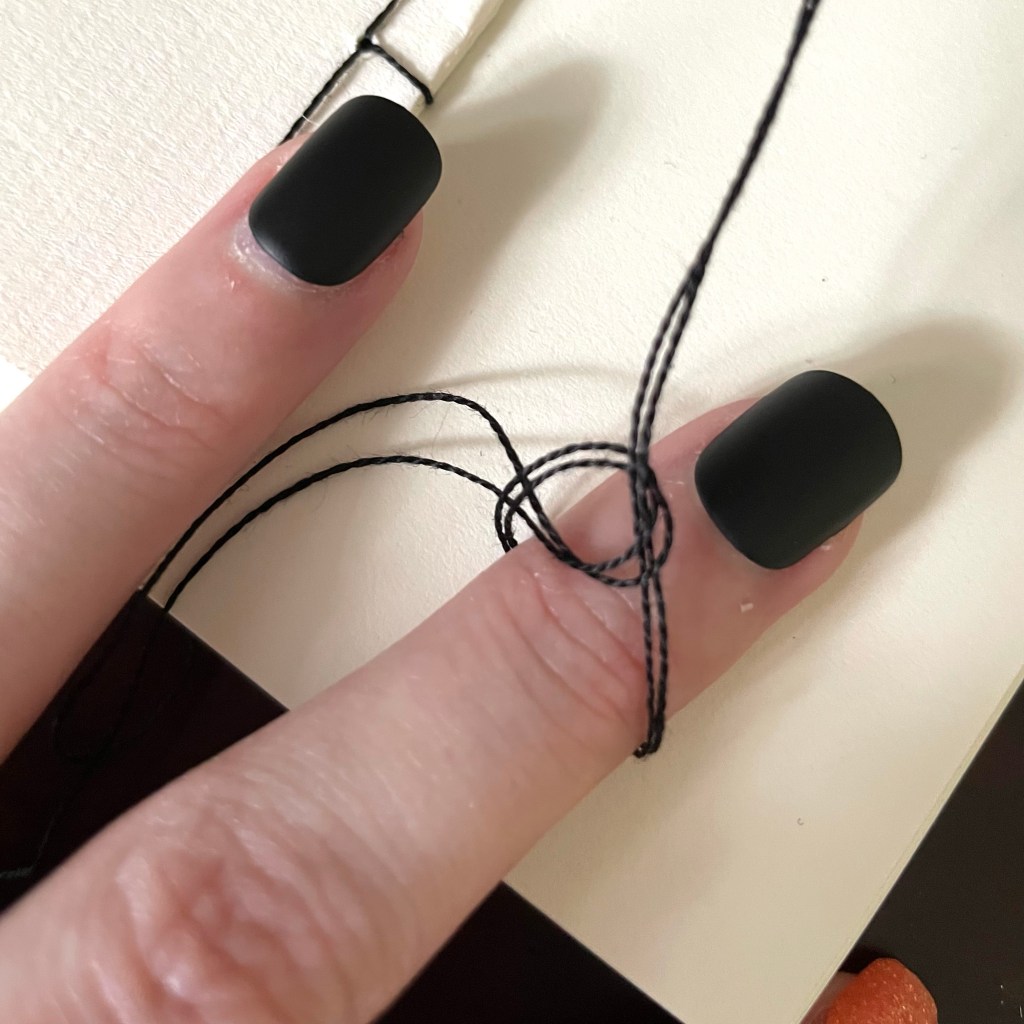
6: Finishing the binding
Finishing the binding consists of 6 steps (not including the optional steps). These are pictured below.
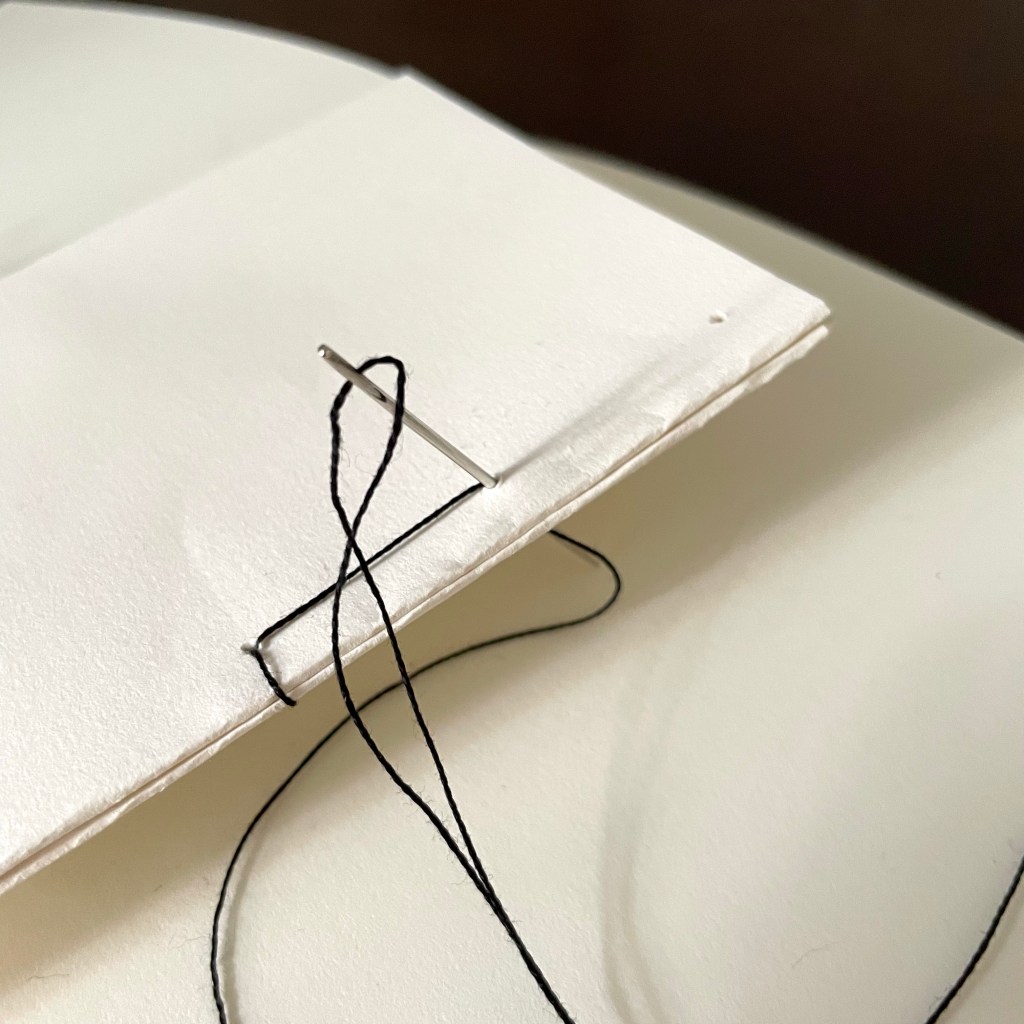
Make an overhand knot around your finger.
Insert the needle through the knot, then use the needle to slide the knot down to the binding edge of the book.
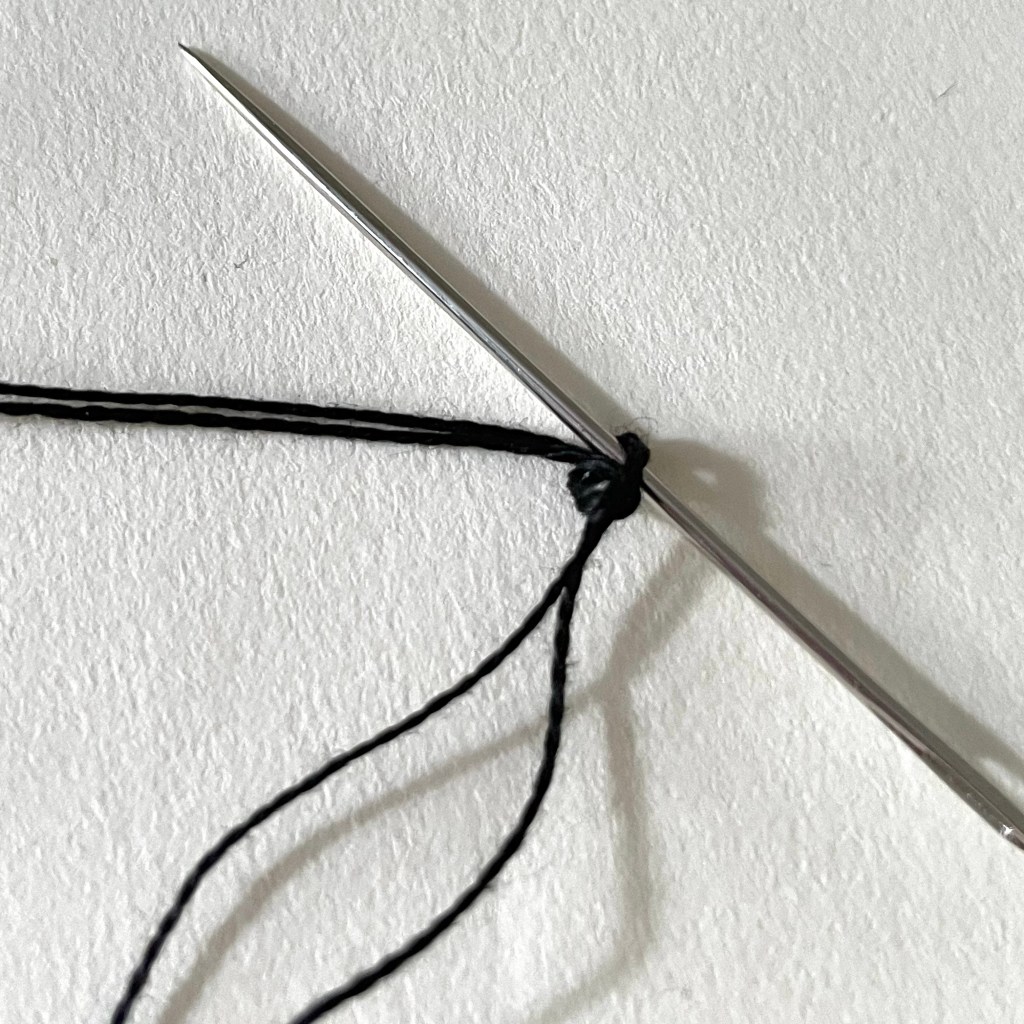
There are now two loops around the binding edge: one from when you were sewing the binding, and a second from the previous step.
Insert the needle through BOTH loops, then make another overhand knot the same way you did before.

Cut the thread one inch from the knot to leave two decorative tails.
NOTE: If you want to add beads to your tails, DO NOT cut them here, and proceed to the optional steps below.
If you do not want to add beads to your tails, skip to the next (non-optional) step after cutting them.
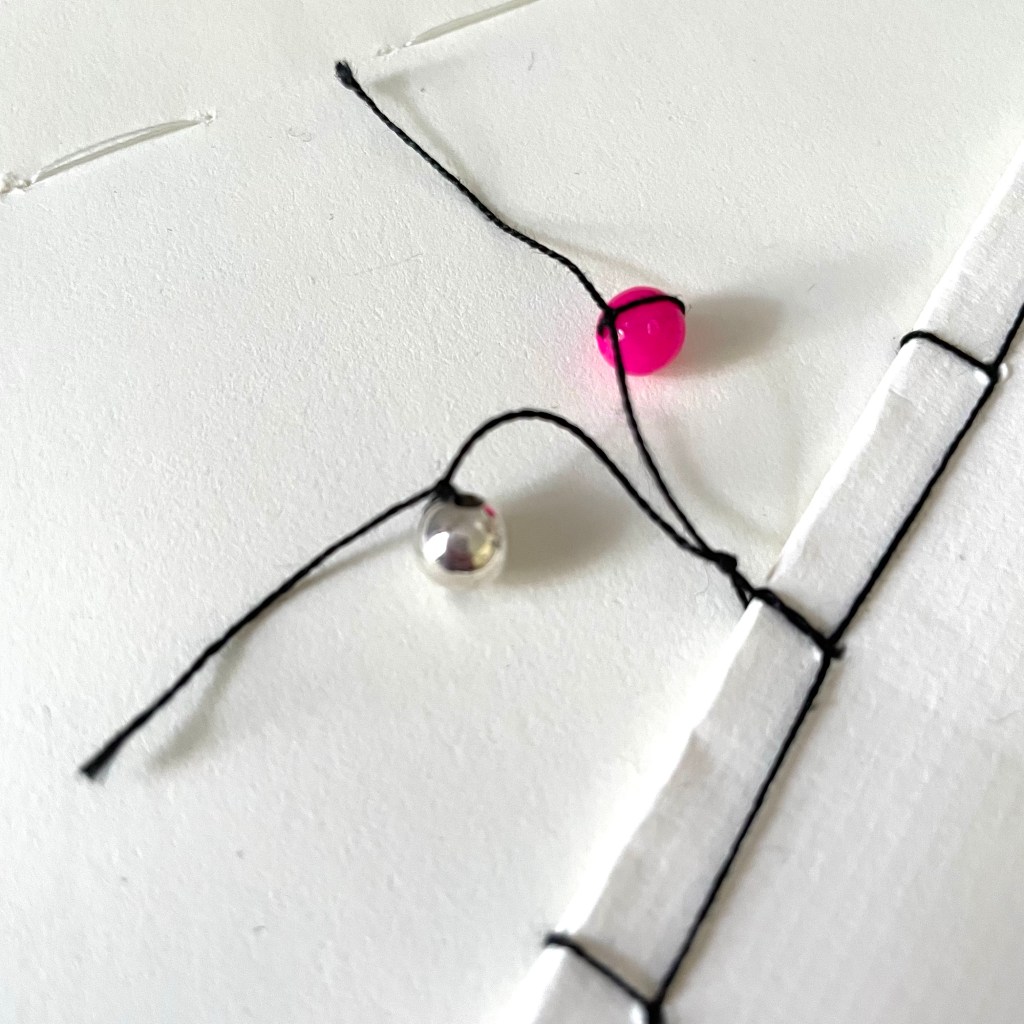
OPTIONAL: Add beads to your tails.
If you want an even more decorative style for your book, you can add some small beads to the tails. Use the following steps:
- Thread the needle with one tail.
- Use the needle to thread the bead onto the tail. (If you have mad skills at threading, the needle is not necessary.)
- Use the end of the tail to make a double overhand knot around the bead.
- Cut the end of the tail to your desired length—but leave at least 3/4 inch of tail so that the knot doesn’t come untied. Alternately, you can add a drop of glue to the knot, and then cut the tail as short as you like.
- Repeat steps 1-4 with the second tail.
I added beads to the tails of my book, which you can see below.
Trim the edges of the pages.
If you recall from when we made our book from Part 1, there is a bit in the middle where the pages are not cut:

Using your scissors, cut along the fold joining the middles pages. This will make the middle pages proper, usable pages.
OPTIONAL: If the vertical edges of your pages are uneven, you can use your scissors (or a paper cutter, if you have one) to cut them so they are even.
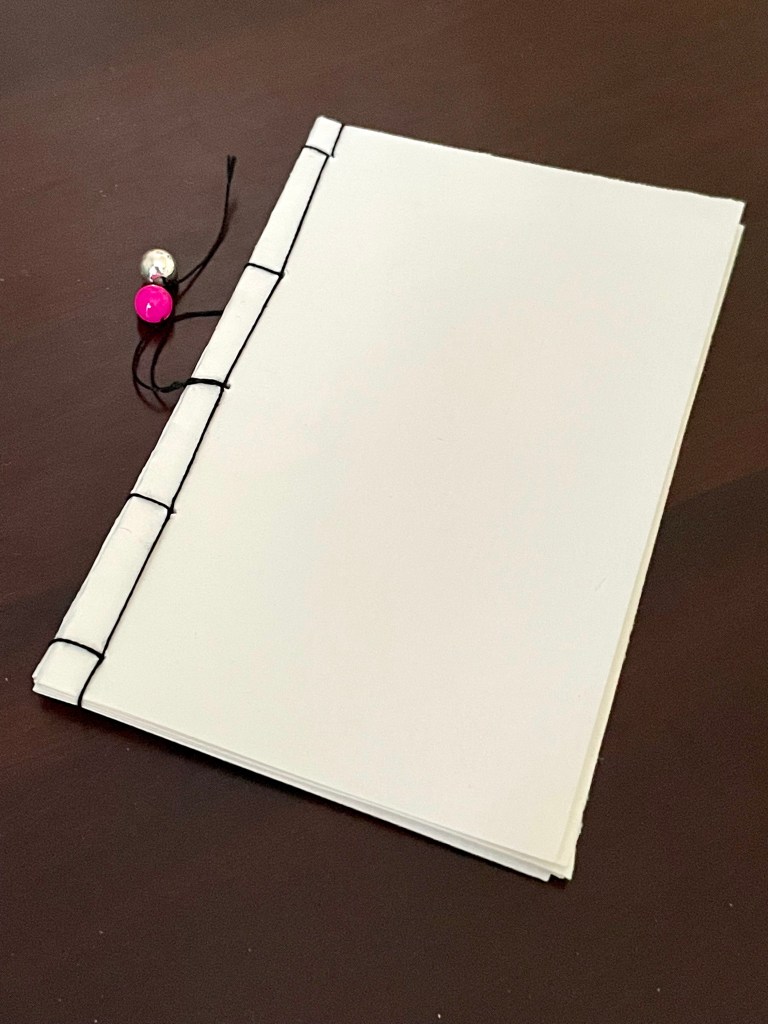
Ta Da! Your book is now finished.
Here’s mine:
Next time we will be making a Pikachu decoration for our book, so stay tuned for that!

Leave a comment